
HANDLING AND MAINTENANCE OF TOOLS

Meat processing plants should supply personnel with the correct types of hand tools, though we should still consider our encounter while doing our house chores and basic equipment. Such tools and equipment must be subject to simple routine servicing and maintenance to be carried out by the personnel on a regular basis. This does not include the servicing of more sophisticated equipment which has to be undertaken by specialized technicians usually sourced through the equipment supplier.
Knives
Due to the multiple operations in the meat sector different types of knives are used for different purposes. There are knives for bleeding, flaying and evisceration of animals as well as for deboning of carcasses, cutting of meat and slicing of choice cuts and processed products. All these knives have very specific design features to support the operations they are made for (Fig. 387). Knives are also used for cutting of other raw materials and casings.
Knives used in meat operations should have basic safety features. The handle should be made of plastic material with non-slip surface and designed to allow a firm and safe grip. Plastic handles are also a hygienic requirement. The end of the handle is often slightly enlarged (handle knob) to prevent the knife from slipping out of the hand and the portion close to the blade should have a similar enlarged design to avoid the hand from slipping over onto the blade

The recommended knife design to facilitate safe handling and avoid injuries
It is of utmost importance that knives are handled with care to avoid injuries to workers and damages to the knife itself. When working with meat, knives must be cleaned frequently to eliminate the risk of cross-contamination. Knives must also be sharpened in a proper way to avoid unnecessary wear and kept sharp to reduce the potential for injuries. Working with a blunt knife requires more force and results in a higher risk of slipping off the meat or bone. It also leads to early fatigue and slower work speed.
Knives used in meat operations

Knife sharpening is a delicate process and requires a special device (Fig. 389). The knife sharpening machines (sand-paper abrasive belts, sand-paper flap-wheels, rotating stones) should be air-ventilated or water-cooled and rotate at a moderate speed. Air ventilated sharpening often causes overheating of the blades, which increases the risk of cutting edge breakage.
Fig 387

Fig. 388: The correct cutting edge shape
During work operations, all knives should be whetted regularly using special steels. These steels are often called sharpening steel, but are in fact only for whetting (polishing of the knife edge). Care must be taken that only steels with safety handles (knob-type handle front for finger protection) are used.
Fig. 390: Sequence during knife polishing with steel


Fig. 389: Knife sharpening machine with sand-paper flapwheel for grinding (right) and whetting (left) Right side: wet stone for sharpening Below in front: polishing steel
Knives must be kept clean and dry and should also be stored safely and visible to avoid accidental injuries to workers (Fig. 391)

Fig. 391: Options for storing knives
Hooks used in the meat sector
In general, two types of hooks are essential for smooth operations in the meat sector. Slaughterhouse or carcass hooks are used for moving and hanging of carcasses. Their design depends on the type of rails (tubular, flat bar) installed. These heavy duty hooks are for sliding or moving on rollers along the rails and have a rotating lower hook part.

Fig. 392: Various hook designs used in slaughterhouses and meat shops
The meat shop hooks are used for hanging meat pieces or sausages. To avoid injuries during handling, the upper end of those hooks is always kept flat. A flat lower end is also used for sausage hooks, while meat hooks display a sharp tip which facilitates the penetration into the meat piece to be suspended.
Grinders and grinder plates and knives
Meat grinders are indispensable equipment in the meat processing industry and are part of practically every meat processing line. Meat processors must be familiar with this type of equipment
Installation:
Care must be taken that grinders are positioned properly. Most grinders have adjustable rubber feet. This allows the horizontal levelling and avoids transfer of vibration from the machine to the table (small models) and floor (industrial grinders). The initial electrical connection to the power supply line should be done with an empty housing (auger / feeding worm and cutting set removed) for safety reasons. Industrial size meat grinders are usually driven by three-phase motors and the direction of rotation must be checked. When viewed from the front, the feeding worm must rotate counter-clockwise. The cutting set is attached to the feeding worm with the cutting edges of the star knives facing counter-clockwise. Before starting the machine for the first time, all parts must be thoroughly cleaned and dried. A useful option often used by meat processors, is to run some clean fat through the system to make sure that remains of grease are removed from the housing and the cutting set.
Operations:
Apart from the need for frequent cleaning, the cutting system of grinders has to be assembled and dismantled at various times per shift or day to be adjusted to the desired particle size. Care must be taken of the following:
- The grinder plates must be frequently checked for any damage to the surface, as a clear cut is only possible when the grinder plates are kept smooth. If damage such as grooves or scratches appear, the grinder plates must be planed (reground) immediately.

Fig. 393: Cutting sets in meat grinders, assembled on feeding worm (auger) Left: UNGER five-piece cutting set Right: ENTERPRISE two-piece cutting set
- The star-knives (cutters) must also be kept sharp. Cutters are usually sharpened at the cutting edges. In systems with replaceable blades these blades are not sharpened but replaced regularly.
- Grooved grinder plates and blunt star-knives result in poor cutting (mashed ground meats).
- Parts from different cutting sets must not be mounted together, as they might be made of materials of different hardness. This can result in grooved grinder plates or damaged star-knives.
- The cutting assembly must never be over-tightened to avoid excessive friction heat and undesirable heat transfer to the meat.
- A grinder should never run empty as this will damage the knives and blades.
In industrial-size grinders, the electrical motor and driveshaft are connected via V-shaped belts. These belts usually require little servicing. Care must only be taken that the belts are kept at the correct tension. If the belts are not sufficiently tightened they show increased wear, excessively tightened belts lead to increased power consumption and could cause damage to the motor or driveshaft.
Cleaning:
Ginders are normally used for mincing raw fresh meat and other animal tissue. Meat grinders and their cutting parts must therefore be cleaned and disinfected frequently - during or at the end of each production cycle in order to maintain a good hygienic status. The most critical spots for cleaning are inside the barrel (feed auger housing). Any meat materials or fats left in the grooves of the thread must be removed by hand, followed by thorough flushing and brushing until all residues are washed out.
The driveshaft pin, where the feeding auger is interlocked, must also be brushed and flushed with plenty of water. The use of a high-pressure water cleaner is discouraged here, as this could damage the rubber seal in which the driveshaft pin rotates. After cleaning, the barrel should be dried properly, also to avoid metal corrosion.
Cleaning of grinder plates provides a special challenge for responsible staff as care must be taken that the many holes are totally free of impurities. This is very difficult in discs with tiny holes for smaller particle sizes. If a high-pressure water cleaner is available, it should be used.
Bowl cutter
Most meat processing lines include a bowl cutter as these machines allow improved processing (“comminuting”) and production of a greater variety of products. Bowl cutters are available in different sizes from single-phase table models for small-scale butcheries and restaurants to bigger three-phase models for medium to larger industrie. The basic maintenance requirements are the same for all models
Installation:
Small table models operate on single-phase electrical power. The equipment is usually positioned on a suitable working table. The operator has to make sure that the knives are installed in the right position and securely tightened .Upon connection to the power supply, the bowl cutter is operational. Other details are similar to bigger models and are explained in the following paragraphs.

d = knife shaft, e = clearance between knife from bowl
Bigger bowl cutters (floor models) need to be positioned with the rim of the bowl levelled horizontally, using the adjustable rubber-feet. The rubber feet should not be replaced by metal bolts, as they facilitate the smooth running of the bowl cutter.
The knives (blades) (Fig. 395c) are inserted following the recommended scheme (Fig. 396) and must be tightened firmly. Care must be taken that the knife head (Fig. 395d) rotates freely in the bowl and cover (always rotate one initial round by hand) and all knives have a sufficient but not too wide clearance (1-2 mm) from the bowl (Fig. 27, 395e). After a few rounds at slow speed, the knives must be tightened again firmly. To avoid unnecessary vibrations from the knife head, bowl cutter knives should be balanced (equilibrated). In bigger bowl cutters with large knives, special balancing sets are used.
The following knife assemblies are common:
Bowl cutters up to 100 litres
3 knives – coarse products, partly frozen materials
4 knives – coarse products, fresh soft materials
6 knives – finely chopped products, pre-ground meats
Bowl cutters above 100 litres
4 knives – all coarse products
8 knives – all finely chopped products
The tension of the drive belt should also be checked. A correct tension3 knives – coarse products, partly frozen materials
4 knives – coarse products, fresh soft materials
6 knives – finely chopped products, pre-ground meats
Bowl cutters above 100 litres
4 knives – all coarse products
8 knives – all finely chopped products

Left top: 3 knives, cutting sequence 1-3-2
Left low: 4 knives, cutting sequence 1-3-2-4
Right top: 6 knives, cutting sequence 1-3-5-2-4-6
Right low: 8 knives, cutting sequence 1-5-3-7-2-6-4-8
The tension of the drive belt should also be checked. A correct tension is achieved when the belt can be manually pressed down between its two fixations only as far as the thickness of the belt itself. A weak tension of the belt will cause premature wear and insufficient drive force. If the belt tension is too strong, it can cause damage to shaft and bearings. The maintenance manual by the equipment manufacturer should always be checked for details.
Operation:
Care must be taken that no metal or other hard materials accidentally find their way into the bowl cutter. It is advisable to frequently check all bolts, nuts and screws, especially around the cover. The cut-out safety switch must be checked regularly to ensure that the knife shaft brake stops the machine immediately if the cover is erroneously opened during operations. The built-in thermometer should also be frequently checked as it could get damaged by vibrations.
All lubrication points (grease nipples) (Fig. 397) have to be greased following the instructions given by the equipment manufacturer and oil changing intervals must be observed. As a rule of the thumb, the knife shaft (Fig. 395d) is usually greased monthly and the motor shaft six-monthly. The oil in the gear assembly (gear box) should be changed yearly.

Cleaning:
Special care must be taken during cleaning. The spaces between the knives (Fig. 398) must be properly cleaned to remove all residues of batter mixes. A brush with long handle should be used to avoid injuries. A critical spot for cleaning is the narrow gap between the rotating bowl and the housing of the knife shaft (Fig. 399) as well as the paddle on the bowl cover (Fig. 400). The knife head should be dismantled regularly for proper cleaning (once a week) and reassembled following the instructions given before.
Moisture and defective seals in switches have a significant negative effect on the functioning of a bowl cutter. When high pressure cleaners are used, direct contact of the water jet with the switches must be avoided. The noise protection lids and front parts of vacuum covers are often made of transparent plastic and must be cleaned with mild cleaning agents to maintain their see-through appearance.


Sausage stuffer
Installation:
Hydraulic sausage stuffers must be placed on an even floor. Before the machine is connected, the power supply with correct voltage (V), frequency (Hz) and power (kVA) must be confirmed. The oil level in the hydraulic tank should be controlled to avoid dry-running of the oil pump and ensure sufficient oil pressure development. In 3-phase (380 V) powered stuffers, it must be confirmed that the piston shaft is moving in the right direction. The piston must be mounted straight to allow smooth vertical movements in both an upward and downward direction.
Operation:
Before the start of each operation, care must be taken that the rubber gaskets are inserted in the piston and lid and funnels of the correct size are firmly attached (Fig. 401). The hydraulic oil must be checked regularly and topped up to maintain the required level. If the oil shows signs of wear (white emulsion-type content or water at the bottom of the tank) it must be replaced to avoid damage to the pump. Strictly avoided should be dropping the funnels on the floor to ensure that they fit neatly onto the outlet opening and maintain their smooth surface as scratches can lead to damaged casings.

Right: Removal and fitting of piston Right: Removal and fitting of piston middle � tool screwed in to press out piston below- tightening of centre bolt / fitting of piston
Cleaning:
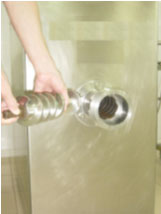
During cleaning the piston must always be removed to allow for thorough cleaning of the whole cylinder. The rubber gaskets must also be removed from the piston and cleaned as remains of sausage mixes could settle in the groove. An opening at the bottom of the cylinder allows the cleaning water to drain out. The funnels must be cleaned with a special brush. A simple method for cleaning the funnels is to first push a compacted wet piece of paper towel through the funnel (Fig. 402) to remove meat materials or sausage batter from inside. As this is a clean operation, such recovered meat materials can be recycled in the production. Wet cleaning is then carried out by using the funnel brush.

Fig. 402: Simple method to retrieve sausage batter from funnels before cleaning by means of a paper towel
Cooking vatCooking vats (Fig. 364) are used to pre-cook raw materials and pasteurise meat products (sausages, hams). In small scale facilities without piped hot water supply, cooking vats are also used to heat up the cleaning water. When cooking vats are not used, stagnant water must be avoided by keeping the water outlet open.
In gas and oil fired vats, burner elements and ignition flames must be frequently checked and cleaned. Most cooking vats are equipped with a thermostat, which needs to be monitored to confirm its readings. During cooking the sensor of the thermostat must be completely covered by water to avoid damage and wrong temperature reading. Cooking vats should never be heated up without a sufficiently high water level to avoid damage to the stainless steel shell.
Band saw
In most meat shops and meat cutting operations, band saws are used to facilitate the breaking of carcasses. In meat processing operations, band saws can also be helpful for cutting of frozen meats. Band saws are available as table and floor models and are made of stainless steel (Fig. 403). The band saw blade moves mainly inside the body (Fig. 404) by rolling over two large wheels. Only a small portion of the rotating blade is exposed just above the band saw table on which the material to be cut is moved.
I will continue tomorrow please check in for update on Tools and equipment maintenance